Tuesday, March 20, 2018

Pathway / Gate

I find myself walking in and to of the gate a lot, caring bricks with a wheel barrel or by hand.
I got another load today.

I put this spring on the gate to make sure the gate closes behind me. The dogs have not tried to get out, but better safe then wasting time trying to catch them.


That eye bolt is for another gate that I can pad lock shut if I want.

I just attached the spring to it and onto the chain link fence.

The little stuff is pleasing.

Saturday, March 17, 2018

Pathway Update


About a month ago, the weather was nice, so we took a little section and leveled it out some.


Last Friday I picked up some more bricks. Friend did not want them anymore. I keep searching craigslist for free bricks and stones. I've seen some, but to far to drive. I'll keep looking. Spring is near, and I bet there will be some people re-landscaping.

Lamp Out Warning - Intermittent

remove these 2 Torx head
Screws
I drive a 2005 Dodge 3500 - Great truck! Diesel and Im getting 21.45 mpg in the city. What's there not to like?

My lamp out warning light would come on intermittently. I would pull over to check the lights and all the lights worked.
This month I need to get the truck inspected, so I figured I needed to get this sorted.

How to pull out tail lights out, or change a tail/brake/reverse light bulb on a 2005 Dodge


Remove the 2 Torx head screws

remove these 2 Torx head
Screws
The lens has pegs that go in these holes

note the 4 phillip head screws


I pulled the tail lights out, and found that I could wiggle one of the bulbs to make it fail.

t should look like this on both sides


With wire melted in


Pulled the bulbs to look closer at them. Noticed that one did not look like the others.
The metal wire on one side looked like it was broken off. So it seemed.

scrapped the plastic off the wire on the left


I did not want to buy another bulb since this bulb was good. We like to fix things instead of sending them to a land fill.

Took out the pocket knife and discovered the wire was not broke off, but just melted into the plastic. I scrapped the plastic, and pulled the wire out some.


pulled the wire out a little


Since the revers bulbs are the same, I just put this bulb in the reverse lights slot.


Lights were great now, time to go get it inspected.


If you need to replace the part the holds the bulbs, the wire can be a little tricky to get unplugged. There is a little red clip or keeper that helps hold the wire connector on that needs to be taken off first. Then you can unplug the wire.
The red clip
the red clip


Thursday, March 8, 2018

Blast from the Past

First note: I did not leave any trash anywhere. I brought it home.


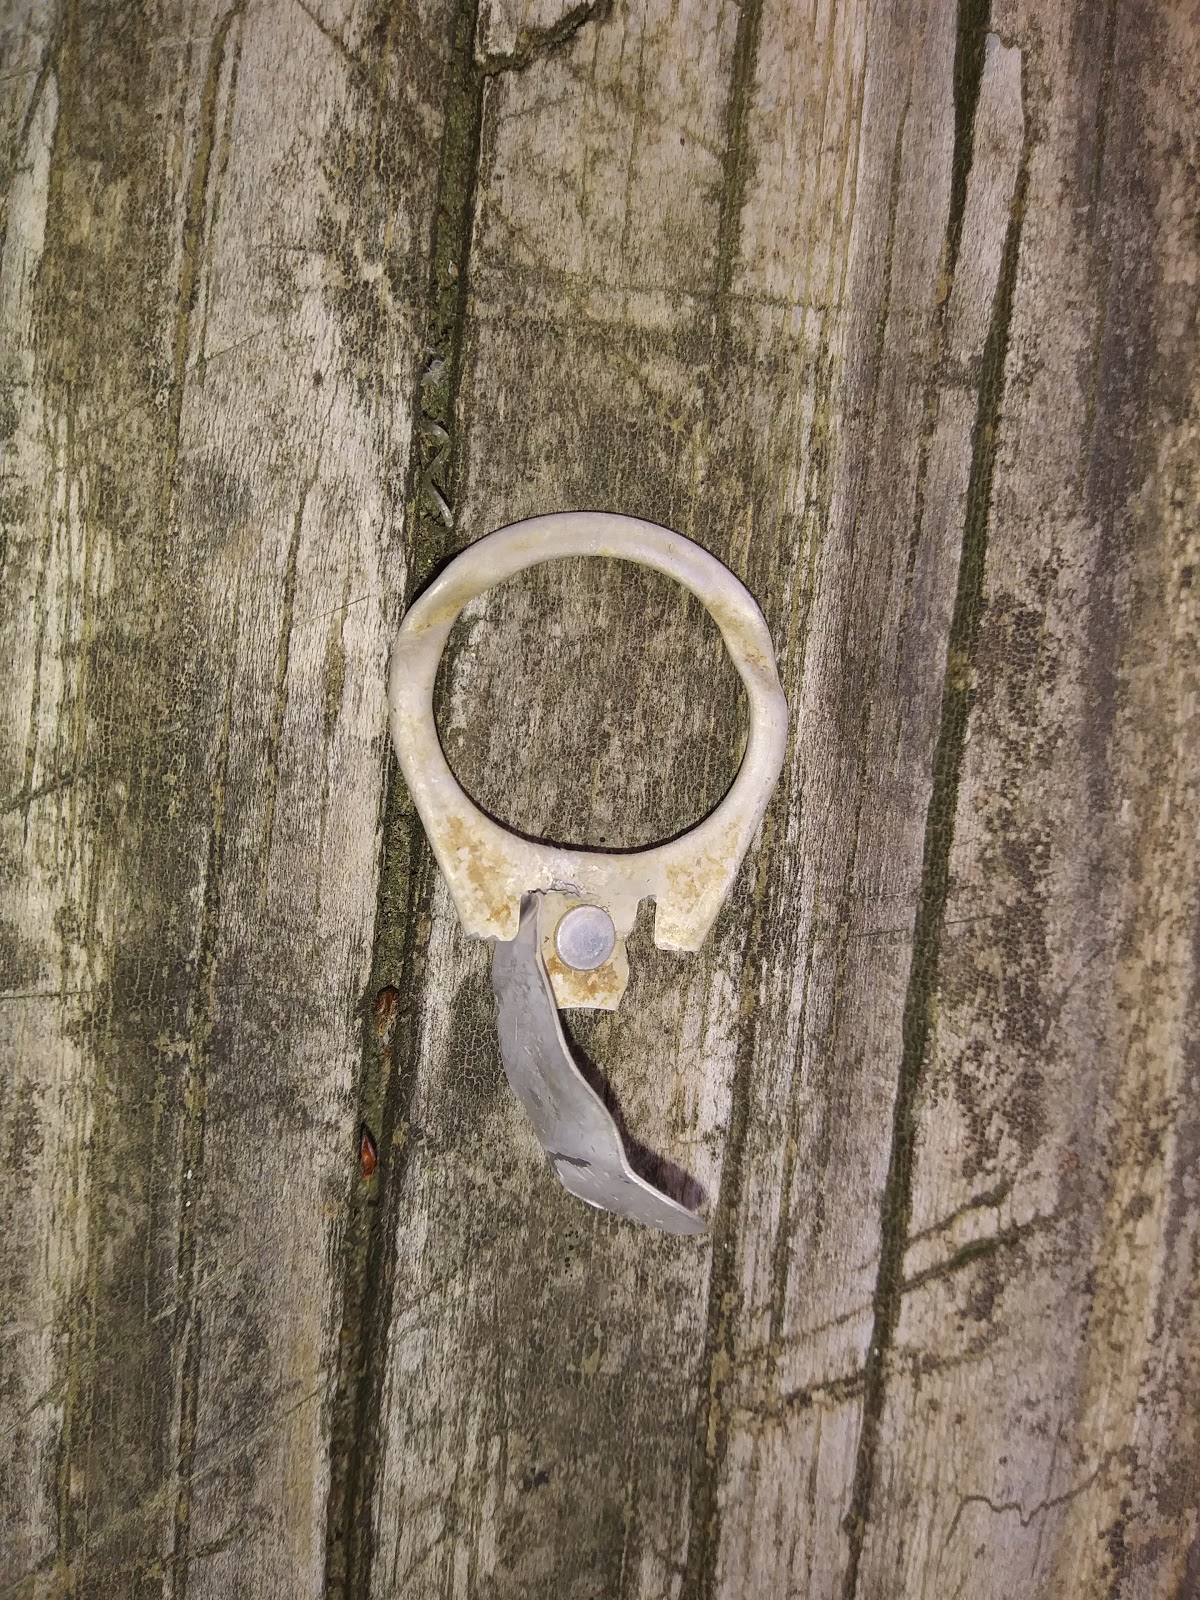
We went Camping this week. I found this old pull tab. Who knows how old it is. I have not seen one in YEARS!


I had a good time shooting it.


For you younger folks, This style tab was used on Coke cans and beer cans in the 70s.
You separate the tab from the round part. Use the tab part like a spring by sliding it in the slot as shown in the picture. Hold the end of the tab and pull the disc back and let go. The round disc will fly pretty far like a Frisbee.

They stopped making these because people were leaving pull pulltabs everywhere. Which make since, but I sure miss them.
I also want to say, Im glad they don't make them anymore, because I hate liter.

After shooting it a number of times, I did not leave it on the ground. I brought it home for more fun....

My son was not impressed.

Sunday, January 7, 2018

Kitchen Faucet

Im not a professional plumber nor do I play one on TV. This is just what I did.

Our kitchen faucet was having problems with flow, the spray hose no longer worked, and it was not as tall as we wanted it. Time to change it.

We went to HomeDepot an picked one out we liked. You should double check the number of holes your sink had for a replacement faucet before going to HomeDepot. My sink has 4 holes. 3 are for the water faucet and 1 for the spray nozzle. HomeDepot gives a 10% veterans discount with valid ID. Lowes gives a discount, but you have to fill out some paperwork and associate it with your phone number.


Removal

First always check for leaks, make sure there are no old leaks even before you start.
Put a towel or bucket under the valves, shut off both the hot and cold water valves, and unhook the water hoses that go to the faucet. If you need to run the hose to a bucket because the faucet leaks you can, because the hose is still attached.
Check to make sure the valve is not leaking before going off to do something else, unless your interested in setting up a Slip-N-Slide in your kitchen. The old valve probably has not been shut off in a long time, so it may leak.

The faucet should have some nuts underneath that you need to take off. Mine was one of those single valve faucets where both hot and cold water go into it. Out of the 3 holes for the faucet the 2 outside holes just had plastic nuts, the center hole had a threaded rod that came down with a metal nut and half-moon looking washer.
once all the lines are disconnected and the nuts are removed the old faucet should come up. If it had been there for years it might take a little coaxing. Maybe a pudy knife around it to get any sealer someone my have used.

Installation

Follow the instructions for the faucet you bought. Mine might be different than yours.

Clean the area well before installing the new faucet while it is easy to get to.
Put the new faucet in the holes and tighten the nuts provided with your faucet set.


The instructions said to put the spray hose in first, so that's what I did. I could have put the spray hose in last so that the hose wouldn't be in my way while working on the faucet connections.


Make sure your faucet is centered like you want it, and tighten those nuts.
Hook up the water lines, turn the water valves back on, and test for leaks. If no leaks your Done!


I was not so lucky, my cold water hose started leaking.
No big deal I shut the valve off. Drove up to the store, picked up another hose and came home. Pulled the old hose off, and tried to put the new hose on. It did not fit the valve. My valve has a flare fitting, but the new hose is for a compression fitting.
Ran back up to the store to look for a different hose. They do not sell a hose with flare fitting on one end. So I started looking for an adapter. They did not sell an adapter. drove to another store. They did not have the hose or adapter either.
Went back home to see if I missed something or to see if I could get it to work.
NOPE, still leaked after trying a few things.
Took a break
The next day realized I just needed to suck it up and replace the valve to what would work with the new hose.
Ran up to the store bought a valve ($7.29), wishing I had done that to begin with.
I already have a torch, flux, and lead free solder. So I did not need to buy that.

Sweating Pipe

Turned the water off at the street.
If you are working on a cold water valve like I was; open all the cold water faucets in the house to try and get as much water out of the lines as you can.
Hot water - be careful if you have a hot water tank. You do not want to drain the water out of that tank if it is still on. You may need to turn it off. Same with tankless hot water heater, you will need to turn it off. In fact if you are not comfortable ask someone and tell them what you're doing, or just turn off the hot water heater and continue.
Under my kitchen sink my water hose was already removed, I opened the valve all the way.
Heated up the part of the valve that is around the copper pipe.
Use gloves - I pulled the valve off as soon as it would let me.
Let the pipe cool.
Cleaned the end of the pipe with sand paper. Cleaned the inside of the valve with sand paper. Make sure your new valve is all the way open, so the rubber seals are not next to the metal that you are going to heat up with the torch. It also helps it vent if needed while soldering.
Applied flux to both the pipe and new valve. Pushed the valve onto the pipe.
Heated the valve, and applied the solder to the opposite side. When it got hot enough the solder is wicked into the joint.
look all around the pipe to make sure you see solder all the way around.
Let the valve cool before turning the valve closed. You still do not want to damage the rubber seal inside the valve.
Close the valve, and have someone watch it while you turn the water back on at the street. If it leaks they can let you know so you can shut the water off right quick. Save you some running.
Hook your faucet hose up, and turn the valve on. Check for leaks. Let the water run to get any junk out of the line.


No leaks your good.


I spent way more time on that than I wanted too, but it is what it is. $12 in parts (new hose, and valve) and I installed our new kitchen faucet.

Friday, January 5, 2018

Florescent Shop Lights

The lighting in my garage has never been great, and I have been doing more stuff in there.

YEARS ago I collected some florescent lights and light fixtures. They really never worked out as far as putting them up in my garage like I thought they would. Most of them are the 4 bulb recessed lighting fixtures you see in a false ceiling.

We have one small hanging fixture that I decieded to hang under the newly made train track rack. If you want to read about the train track rack click here.

The outside width of the bracket is 35", but the hooks on the florescent lights are 37 or 38" apart. Found some hooks, that I was able to bend out to make up the extra length. So I predrilled and screwed them into the side of the brackets.

Hung the light.

This light actually has a 110v plug on the end of it. I figured I will put an outlet by the light and run it to a light switch in the near future. For now I can just plug it into an extension cord when I want to use it.

Well it doesn't work. I tried a few bulbs I had to see if it was the bulbs. None of the bulbs I had worked. Im thinking it is the ballast, but not sure.

I wired in one of the big 4 bulb florescent fixtures I have and tested the bulbs. The bulbs work. So this told me the ballast gave up the ghost.

I went ahead and removed one of the ballasts from the bigger fixture that worked and replaced the bad ballast in the small light fixture.

Works like a champ!

Did I mention I like to recycle? Those light fixtures were on the way to a dumpster.

I didn't think to take pictures of replacing the ballast when I did it. Once apon a time I was a maintenance man; I have replaced hundreds of florescent bulbs and ballasts.

It's very simple to replace the ballast. Most of them are accessed by opening a panel in the center of the fixture. Most Ballasts these days have the same wire colors. The Black wire is power, the white wire is the neutral wire. There are also 2 yellow, 2 blue, and 2 red wires which goes to the lights.

If the ballast has been changed before most likely there are wire nuts connecting the ballast to the corresponding wires. If the ballast has never been replaced than you will need to cut the wires, and match the color wires. Just use wire nuts to connect them.

I put all the fixtures back up, meaning they are back in a corner behind a 4 bolt main 350 chevy engine, a canoe, and a bunch of other stuff.
I will drag them back out in a few days and take some pictures so you can see what I'm talking about.

Leave a note about what your working on. I would like o read about it.

Tuesday, December 26, 2017

Volume Pedal - Build


Guitar Volume Pedal - I was looking for easy projects to get back into soldering and electronic components. Plus a great Christmas gift.

Parts List

  • 2 Audio 1/4" female jacks (purchased on Amazon)
  • 1 Potentiometer 100K Ohm (purchased on Amazon) - (I plan on experimenting with this value)
  • 1 Capacitor 100kpF (I had one)
  • Hinge
  • Wire
  • Wood
  • She kind of cording
I searched on the internet and found a few different pedal builds. I picked one I thought would be pretty easy. After building this one I have a lot of improvements. I will document the next build as well so you will see the differences. 

So, cut out the pieces, glued and nailed them together. The next build I will document the dimensions. Im using 1/2" plywood, and the dimensions I found online were for 1/4" hard board. So the walls on mine are thick, and crazy strong. It is an over kill.

Since it is so thick I needed to cut out the places where I wanted the 1/4" audio jacks. I used a hole saw, and cut down most of the way. That left a raised part on the inside. I drilled the center hole so that the jack would slip in. The hole was not deep enough for the jack to come to the other end and be able to put a nut on it. I used a spade but, drilled a little, checked it, drilled some more and checked it until I liked how much the jack stuck out the other side.

I tried cutting gears, but that proved to be a pain. I might design some gears and print them out on the 3D printer at the library next time.

I made a spool to fit on the potentiometer (Pot). I have a piece of round stock in the garage. I cut a sliver and drilled a hole in the middle to slip over the pot.


I found a bracket to mount the pot too. Any "L" bracket will work. I had to drill a hole out on this bracket and notch it for the tab on the pot that keeps it from spinning in the hole.


I mounted the pot and placed the bracket where I wanted to, then screwed it in. 


pot mounted with spool


Assembled wood parts, sanded and started primer and painting.


Once I got the base coat of paint down, I started getting the components ready to be installed.

Circuit work
  1. Used a multimeter to check the pot to know what will be attached to which terminal
  2. Cut all the lengths of wires needed. I used different colors to help me keep it straight.
    • Yellow - jack tips
    • Black - jack rings
    • Purple - capacitor
  3.  Solder tined all the ends of the wires, jacks, pot, and capacitor. 
  4. Soldered the wires to the jacks
    • made sure I put the right wires on each jack. mine was easy, the shorter black and yellow to one jack and the long ones on the other jack
    • both jack rings to same post on pot
      jacks tip, and capacitor is split between the other 2 posts
    • Capacitors have a shielded side, but it does not matter much in an inclosure like this, but still I put the wire on the sided I wanted it to be on.
  5. installed the jacks in the housing
  6. Soldered the ends of the wires to the pot
    • verified after each solder to make sure it was correct and continuity.
  7. Glued the capacitor down with a dab of wood glue.


capacitor glued down


Onto the mechanical portion - the cord needs to be connected to the under side of one side of the pedal, ran through a hold in the body. looped around the pot spool, then down to the other end and connected to the other under side of the pedal.

picture of the bolt and the change of direction of the cord.
I drilled holds in the top of the base. Attached the pedal to the base, and used an awl to mark the pedal where I wanted to connect the cording. Detached the pedal, and attached the cording. On the bottom end I drilled a hole in the side of the housing and put a bolt all the way through so that the cord change direction and will be able to route a straight path to the pot.

You need a way to keep tension on the cord, but not too much. You can use a rubber band or a spring.
One of the versions of this mechanism I cut grove in the spool to keep the cording from splitting off. but I was also experimenting with different ways to attached the 2 ends off the cord. I used too much pressure and ruined that spool.


Worked on a bottom cover.


I found the cord would slip off the spool, so I sanded the center with a rotary tool. First time I did it, I took too much off, so had to make another spool again. In all I created 5 spools until I was happy with one. By sanding the center it leaves a lip on the outside that helps to keep the cord from sliding of the sides.


To see more explanation on the outside paint click here


Who knows maybe I will try making a Wah-Wah pedal sometime.

Featured Posts

Blast from the Past

 Old picture of a 56 Chevy.