Lawn mowers need an oil change like cars do. Even the small push mowers need oil changes. They will last a lot longer, and run better with proper maintenance.
 |
| It was nice out |
Things you need to change the oil on a riding lawnmower
- oil filter
- oil
- funnel
- something to catch the old oil in
- oil filter wrench, or some big pliers (Chanel Lock Pliers)
- maybe a wrench, depending on your mower. I did not need it on mine
- Rags are handy for messes

real quick, You may have already known this... I have this drain pan I picked up at an auto parts place. They have plugs, so it is easier to seal it and carry it. There is a plug in the middle where the main hole is. You can loosen it and it sticks up. it seems like that is the way you use it. Ive been doing it that way for years, and its always a pain to screw it back in. The center plug gets all oily after you drain oil into it. I just pull the plug completely out before draining oil into it. Then put it back in when Im done.

Do you the drain tube? A lot of dirt and grim on it. After wiping it off with a rag, its a lot easier to see.
On this model, the oil drain is just a cap that is on the right side of the mower. You just twist and pull off. No need for a wrench. It seals by an O-ring. Make sure you have something under it before pulling the cap off. I could not fit the big car drain pan in. I found a clear plastic container that worked perfectly.

 |
| Close up of the oil drain cap on |
Inspect the o-ring make sure it is not cracked or anything. wipe it off, and put the cover back on once all the oil is drained.
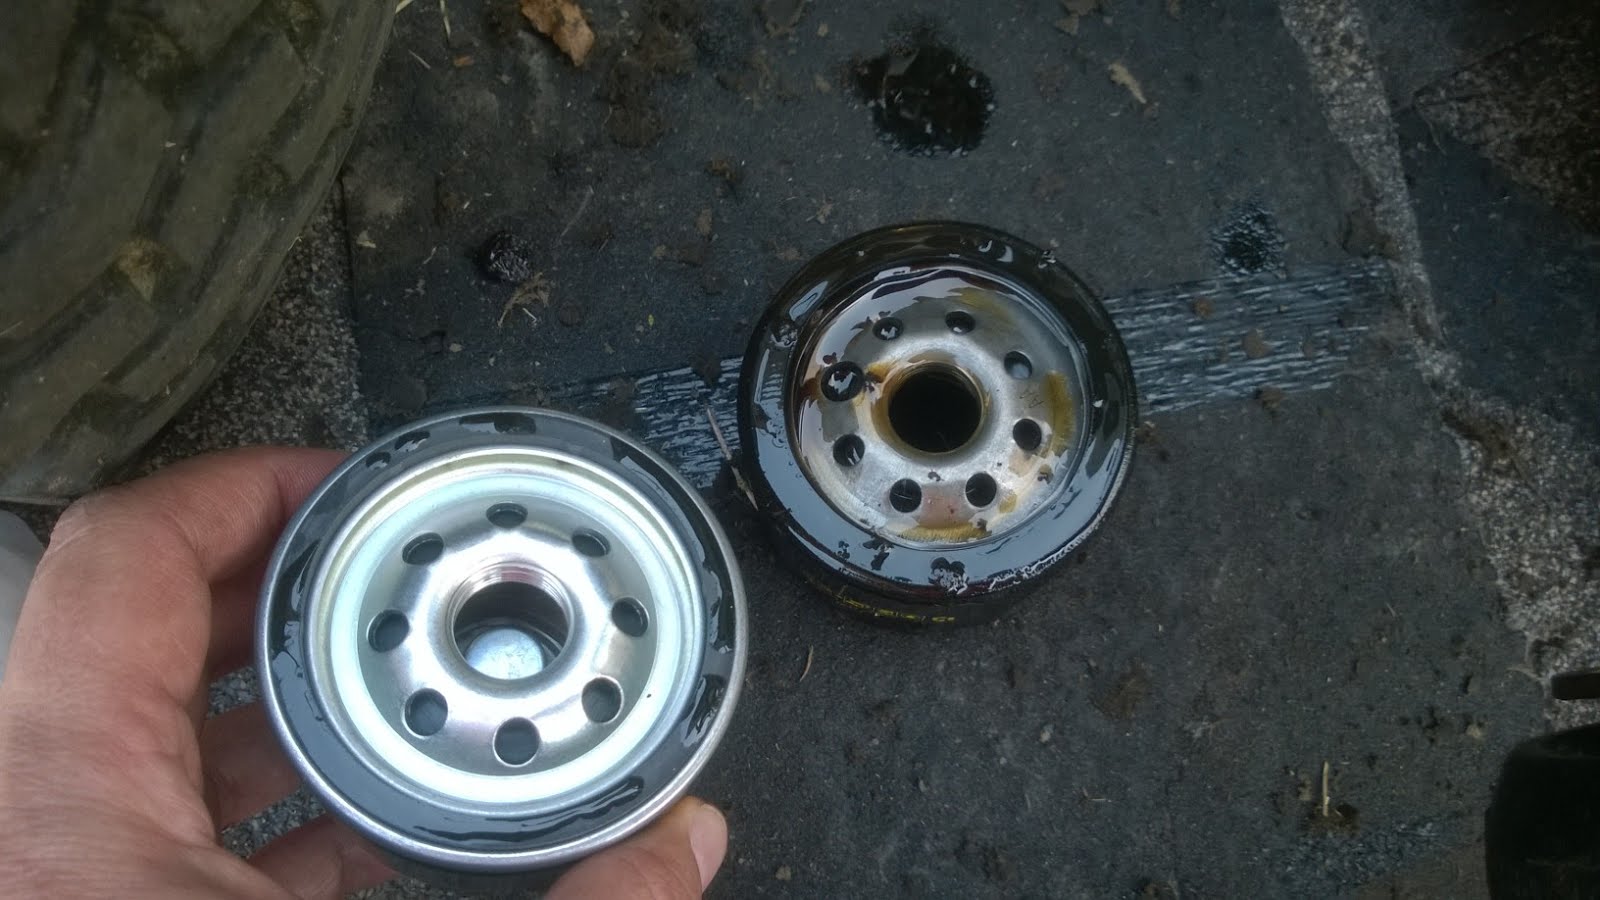
All Drained? Put the cap back on and move over to the other side and remove the oil filter. If you have an oil wrench good, I got a ton of them too. I have found a big set of channel locks works easier for me.

Inspect and make sure your new filter looks similar to the old one. Look to see if the threads and hole are the same. Also check that the gasket is the same size. Just put them end to end.
Put a light coat of oil on the gasket and screw it back onto the engine. Remember when screwing the filter back on it does not have to be gorilla tight.
Put oil back in the engine - Pull the dip stick out and use a funnel to put oil back in the hole the dip stick came out. Do not over fill. You changed the oil filter, so put some oil in until it reads on the full mark on the dip stick. Start the engine for a few seconds to let the oil circulate in the engine and fill the oil filter back up. Then shut the engine off and check the oil again. Add more to to the full mark. Start the engine and let it run, check for any oil leaks. Make sure no leaks around the oil filter, or the drain cap.
I realize I need to do better with pictures. Im not used to taking pictures while I work. After I got in the house to post this, I see that I should have taken a picture of the marks on the dip stick, and a few others. If you have any questions and need a picture, I will see what I can do.
Where ever you purchased your oil from, most of the time they will also take the used oil back. Always dispose of your used oil properly. We have a recycle center close that takes used oil. Auto Parts stores also take used oil. It is easy to do.
Post a comment, let me know if you like this or not.
Lets move onto the next project!

 I just wiped it of with a rag. One these types of batteries you need to check and make sure the water is topped off.